How To Use a Controller for Minecraft on Windows 10? (2 ways)
If you often play on console, to Minecraft or other games, maybe you worry about playing Minecraft on PC with a mouse and keyboard?
You shouldn’t, as it’s possible to play Minecraft PC/Java with your favorite controller!
On Windows 10, a USB controller can be configured to assist the keyboard input, including the Minecraft controls. A first solution is to use the TV mode on Steam (“Big Picture”), and the second one, is to install the “Controllable” mod on Minecraft.
I’ll now explain in details how to use these two solutions to play Minecraft with a controller on Windows 10.
I have also seen other solutions with SCPServer or GlovePie, but I find them less convenient, so I skipped them in his article. But you can still take a look at these if the two I introduce here are not for you.
Solution 1: Install the “Controllable” mod for Minecraft
I will start with this solution because it’s the easiest one I think, especially if you are used to adding mod on your Minecraft launcher.
Mod introduction
The “Controllable” mod allow, as the name say, to play Minecraft games with a controller.
It’s a basic mod that works well with Forge and display controls on your scripts when a controller is plugged.
You can still use the mouse and keyboard at any time, so you can keep this mod installed, even if you don’t use your controller all the time.
Download Controllable
You can download the Controllable mod here.
Scroll down to the bottom of the page to see the download links.
If you already have Forge installed, or if you need a specific Minecraft version, take the corresponding mod version.
During writing, the mod is available up to 1.16.3 wile Minecraft and Minecraft Forge are already on 1.16.5.
So make your choice depending on your needs, and try an older version if you experience any issue with the latest ones.
Good news, the download is direct, no ads or redirect to a strange website, enjoy!
Install the mod with Minecraft Forge
Once your mod downloaded, we need to install it!
To do this, I recommend using Forge that works perfectly for this.
I’m not an expert with mods on the Minecraft client, but if you are used to another launcher your can try it too, no problem.
Install Forge
- Open the Minecraft Forge website
- Pick the version you want to use in the left menu (if possible, take the same as the latest mod version)
- Then choose the Installer in the “Download Recommended” column:

If you are trying to install it on a recent Minecraft versions, the “Recommended” section might be missing.
In this case, use the installer in the “Latest” column. - When you click on the Installer icon, you’ll be redirected to an ads page, that you can skip after a few seconds (button on the top right of your screen).
- The file download starts
- Once downloaded, you can double-click on the file to start the setup wizard:

Keep the default options and click on “OK” to start the installation.
We only need the client part for this tutorial.


Once done, Forge is ready to be used, we just need to add the Controllable mod to our installation.
Install Controllable
Installing the mod will be much simpler:
- Go into your “.minecraft” folder
On Windows, it’s in C:\Users\<YourName>\AppData\Roaming\.minecraft
On Linux, it’s a hidden folder in your home directory, for example: /home/<user>/.minecraft. Use CTRL+H to display the hidden files. - You should find a folder name “mods”
If not, you can create it manually, with the same name - Copy the Controllable mod file into this folder
That’s it! The mod is installed and should work fine.
Start a game
If it’s not already done, start by plugging in your controller, et wait a few minutes for your system to install it.
You can now start the game and check if everything is working as expected.
Don’t forget to choose the Forge profile when you start the launcher:
- Connect to your account if needed, but don’t hit “Play” for the moment
- On the bottom left of the screen, check if you have “Forge” in the options list:

- If it’s not the case, you have to go to “Configurations” and add a new one, by picking the Forge version you just installed.
- Once done, come back to the main menu and start your game

If it’s your first time with Forge, the start screen will be a little different as you are used to, but it’s normal 🙂
Controller configuration
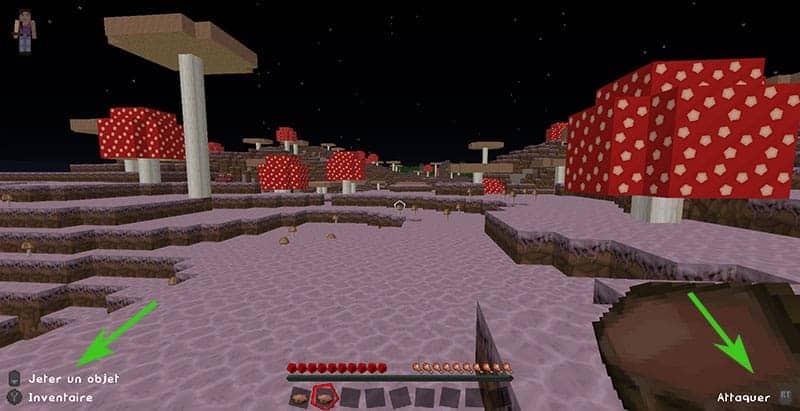
I recommend starting with a Solo game in the correct version for the mod (create a new world for example) et test that everything seems to work correctly.
I didn’t need to change anything on my tests.
I tried with a PS4 controller that I love and which is probably the most compatible option for that kind of solution. If you have something less common, maybe you’ll need to fix a few things.
Solution 2: Start Minecraft with Steam
The other option is to use Steam. As most of you probably already have it, it can be a faster solution in some cases.
How does it work?
Steam is a game marketplace that you probably already know very well.
What you may not know yet, it’s that Steam includes a “Big Picture” mode to use it on a TV with a game controller. It’s possible to play a bit with this option to use the game pad to control the PC directly.
Minecraft is not a native Steam game, so you have to add it manually before using the “Big Picture” mode.
Install Steam
If you don’t have it yet, start by installing Steam.
There is nothing complicated, so I’ll be quick on this part. You should be able to install it easily.
You can download the setup file here, it’s available on Windows, macOS and Linux.
Download the file et install it before reading the next step.
Add Minecraft Java in Steam
As explained previously, Minecraft is distribution by Mojang / Microsoft and is not available in Steam.
But you can add it manually, as an external game, to use it like a steam game.
That’s what we’ll do right now:
- Once in Steam, click on the “Add game” button on the bottom left of your screen
- In the list that opens, choose “Add a non-Steam game”:

- A list with all your installed apps shows up.
Check the box corresponding to the Minecraft launcher:
- Then click on “Add selected” to confirm
- Minecraft should now appear in your Steam library


We are ready to switch to the “Big Picture” mode et start the game from Steam.
Start the game in “Big Picture” mode
To start the “Big Picture” mode, you just need to click on the “Full screen” icon on the top right of your screen, next to your username.
Don’t forget to plug your game controller before that.

Once here, you might already use your controller to browse in this interface.
If not, use your mouse to go into the settings panel (the wheel icon on the top right), then “Controller configuration”.
Make sure your controller is detected and that the configuration is enabled for the controller you use.
For example, you might need to enable the XBOX or PlayStation controller to use that kind of controller in a game.
Start Minecraft
Once your controller is working in the main menu, you just need to start the game from there:
- On the home menu, click on “Library”
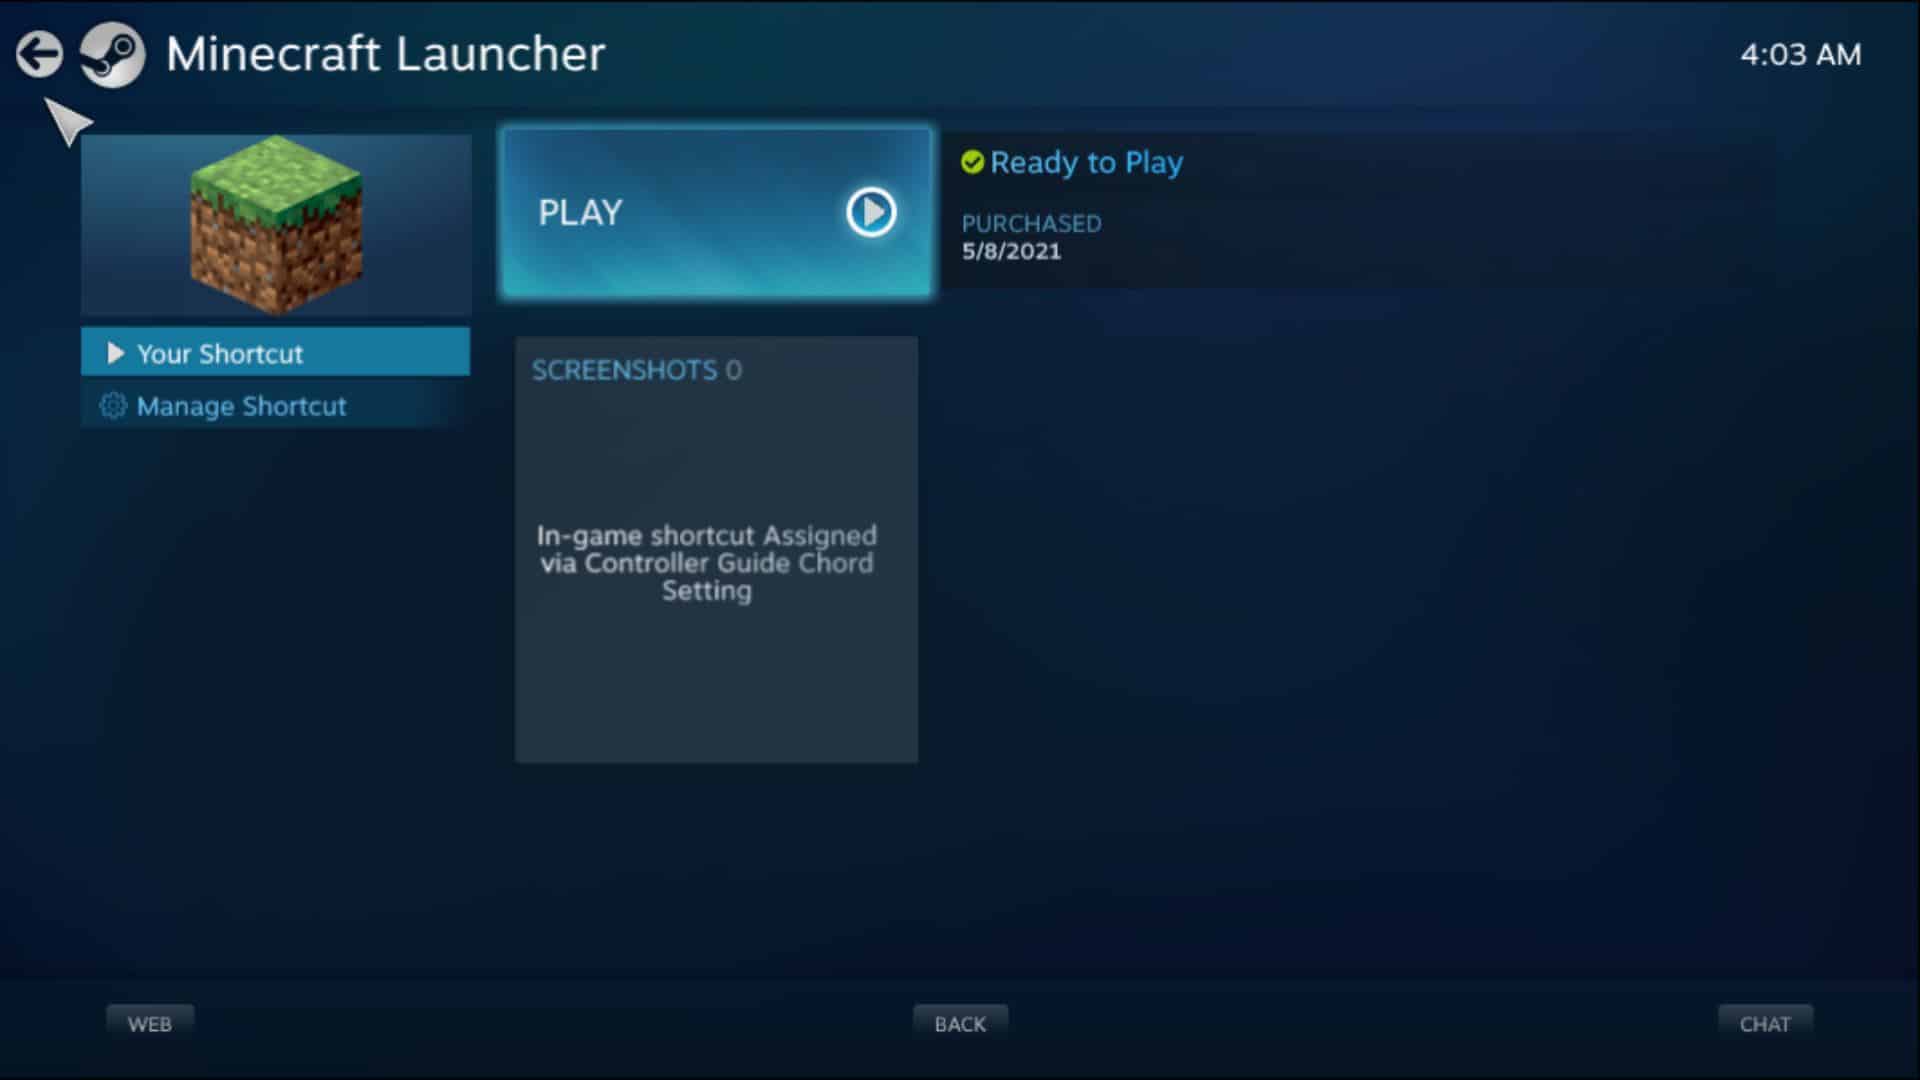
- Scroll down until you find the Minecraft game in your list, and click on it:

- Before starting the game, you can once more configure the controller:
- Click on “Manage Shortcut”
- Then “Controller Configuration”
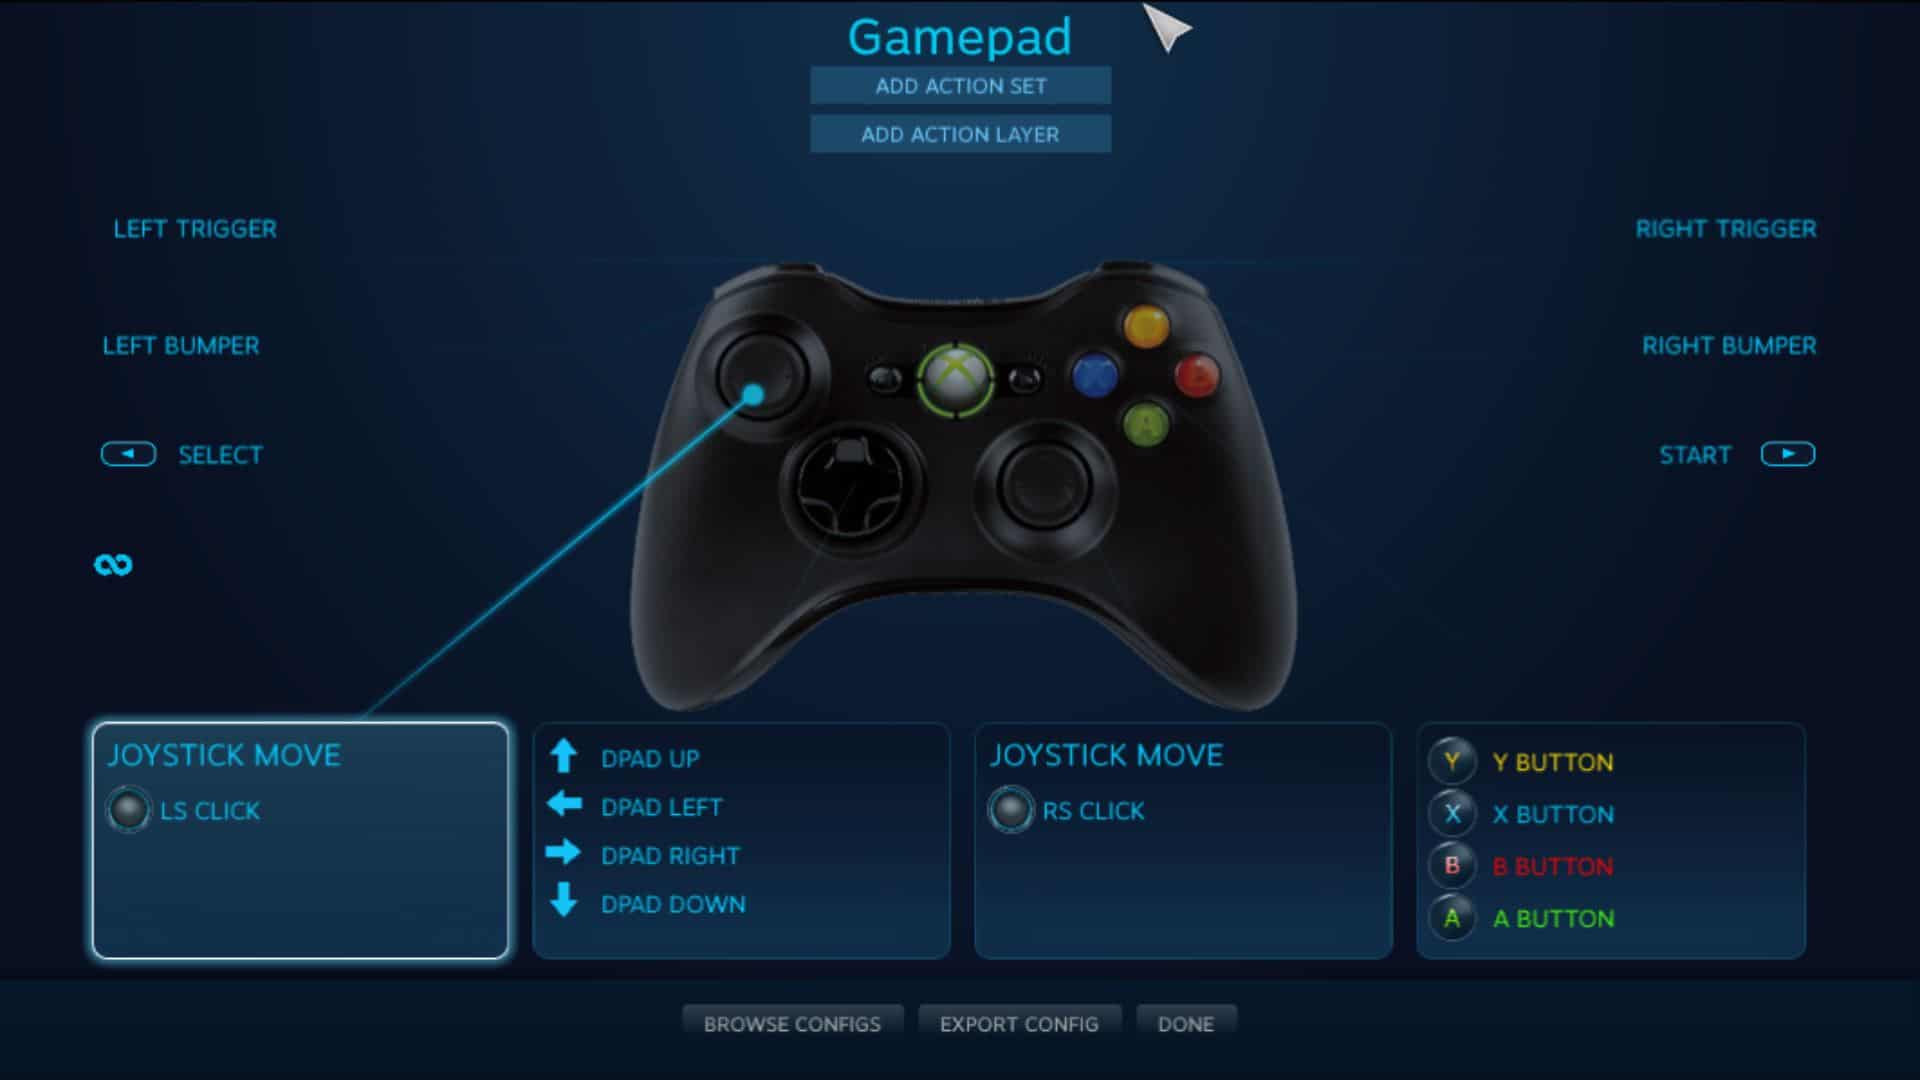
- Once here, you need to link the keyboard keys with the controller buttons
For example, you can use A to sneak and B to jump, etc. - It looks like this:

Make sure to configure everything before going further
- After this step, you can start your game and enjoy your controller 🙂
Play with your controller
For your information, it seems the game doesn’t start in the foreground. If you have only one screen, you might need to use ALT+TAB to switch to your Minecraft menu.
I have to start the game with the mouse, but once in a game the controller was working perfectly.
I recommend taking note of all the keys and shortcuts that don’t work as expected, and to quickly get back to the configuration screen to fix everything.
For example, I’m not using a QWERTY keyboard, so I had to get back to the configuration and switch a few things to keep it simple.
Conclusion
That’s it, you now know two good solutions to use a controller in Minecraft Java.
I admit that I prefer the first one, that I find easier to configure. But I read that it doesn’t work for all the controllers, that why I also added the second option, just in case.
Anyway, I’m not a big fan of playing Minecraft with a controller, so I just tried to help you, I hope you were successful 🙂
Enjoy you game!


